Optimizing PNG Files: A Comprehensive Guide to Smaller, Faster Images
Whether you are dealing with PNG images or another type of raster graphics, the goal is the same—make them smaller for better performance without sacrificing quality, or at least, as little as possible. If you’re building a website, designing product shots, or managing a huge image library, someone might suggest optimizing your PNGs to boost performance, especially when it comes to faster load times. In this guide, I’ll walk you through various ways and tools to optimize PNG images, from lossless methods to lossy compression techniques.
1. Tools for Lossless PNG Optimization
If maintaining image quality and every pixel is your priority, lossless optimization is your best option. These tools compress PNGs by removing unnecessary data like metadata and tweaking compression algorithms without reducing the image quality.
PNGcrush: A command-line tool that tests several compression methods and picks the most efficient one. It’s a reliable tool for lossless compression, ensuring no loss in image quality.
- Example usage:
pngcrush -brute input.png output.png
OptiPNG: Similar to PNGcrush, but sometimes more aggressive in reducing file size. It tries various optimization levels, making it popular among developers.
- Example usage:
optipng -o7 input.png(The-o7flag enables maximum optimization.)
ImageMagick: A versatile image manipulation tool that supports optimization via command-line options like -strip, which removes metadata.
- Example usage:
convert input.png -strip output.png
2. Tools for Lossy PNG Optimization
For significantly reducing file size, lossy optimization is your go-to. This method sacrifices a bit of image quality—often not noticeable—to achieve substantial file size savings.
pngquant: One of the most well-known lossy optimizers for PNG files. It reduces the number of colors in an image, striking a good balance between size and quality.
- Example usage:
pngquant --quality=65-80 input.png(In this example,65-80represents the quality range, allowing you to control the final output.)
TinyPNG: A simple online tool for lossy compression. Just upload your files, and it optimizes them for you. It’s great for non-technical users looking for quick results.
- Visit: TinyPNG to upload and optimize your images.
3. Manual PNG Optimization Techniques
Aside from automated tools, manual techniques can significantly improve image optimization.
Resize Image Dimensions: Resizing images to only the dimensions needed is one of the most effective ways to reduce file size. For example, if your image is displayed at 300x300 pixels, there’s no need to use a 1200x1200 pixel image. You can resize PNGs using design software like Photoshop, GIMP, or programmatically with HTML Canvas.
- Example using HTML Canvas:
const canvas = document.createElement('canvas');
const context = canvas.getContext('2d');
const image = new Image();

image.onload = function() {
    canvas.width = desiredWidth;
    canvas.height = desiredHeight;
    context.drawImage(image, 0, 0, desiredWidth, desiredHeight);
    canvas.toDataURL('image/png');
};

image.src = 'input.png';
Reduce Bit Depth: PNGs support various bit depths (8-bit, 24-bit, etc.). Reducing the bit depth, especially when using a limited color palette, can significantly reduce file sizes with minimal quality loss.
Remove Metadata: Many PNG files contain metadata such as creation dates, camera details, or editing history. While useful in some contexts, it’s generally unnecessary for web images. Removing metadata using tools like ImageMagick can slim down your PNG files.
- Example usage:
convert input.png -strip output.png
4. Batch Processing PNGs
If you have multiple images, manually optimizing each one can be time-consuming. Luckily, batch processing scripts streamline this task. For example, with pngquant, you can compress an entire directory of PNGs in one go:
- Batch Processing Example:
for img in *.png; do
  pngquant --quality=65-80 "$img" --output "optimized_$img"
done
5. Automating PNG Optimization in Build Tools
For developers managing large projects, integrating PNG optimization into your build process can save time and ensure consistent results across the board.
- Webpack: Use plugins like
image-webpack-loaderto automate image optimization during your build process. - Gulp: If you prefer Gulp,
gulp-imageminis a great tool for automating PNG (and other image formats) optimization as part of your workflow.
Which Optimization Tool is Best?
The best optimization tool depends on your priority—preserving image quality or reducing file size.
For Lossless Compression: OptiPNG generally achieves smaller file sizes compared to PNGcrush, but both are excellent if preserving quality is critical.
- Recommendation:
optipng -o7 input.pngfor maximum compression without quality loss.
- Recommendation:
For Lossy Compression: pngquant strikes the best balance between file size reduction and minor quality degradation. TinyPNG is also a great alternative for an easy-to-use online tool.
- Recommendation:
pngquant --quality=65-80 input.pngfor significant size reduction with slight quality trade-offs.
- Recommendation:
Final Thoughts
Optimizing PNG files doesn’t have to be complicated. Whether you choose lossless methods to preserve every pixel or lossy techniques to shrink file sizes dramatically, there’s a tool or method for every situation. By incorporating these optimizations into your workflow, you’ll ensure faster load times, better performance, and a more streamlined user experience.
For those who prefer the simplest approach, TinyPNG is a powerful tool that requires no installation. On the other hand, developers working on larger projects may benefit from automating their image optimization through build tools like Webpack or Gulp.
No matter your approach, optimizing PNGs is a crucial step toward a faster, leaner digital experience.
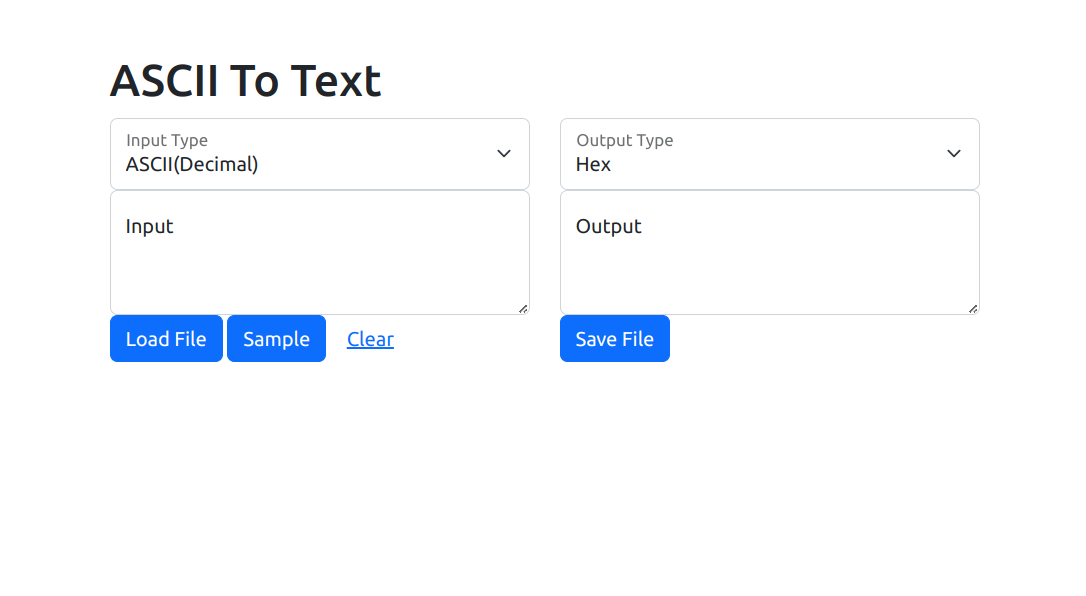
How to convert ASCII characters to integer keycodes(binary, decimal or hexadecimal)
An easy-going tutorial on making a cool ASCII converter that plays with text, ASCII characters symbols, and codes: Learn how to use JS to convert from text to ASCII codes, as decimal, binary, hex codes and from ASCII codes to text.

Tips&Tricks to Port and Convert Your Games from ActionScript3 to CreateJs and Typescript
Explore how to transition from ActionScript 3 to CreateJS and TypeScript. TypeScript offers better code maintenance for complex projects, while CreateJS mimics the Flash class hierarchy, ensuring familiarity. Key differences include mandatory "this" usage in TypeScript and new event handling in CreateJS. Learn more in our guide for a smooth switch to HTML5 game development.

Using DrawingCanvas to take a snapshot of a Canvas in Construct 3
In this Construct 3 tutorial you can learn how to take a specific screenshot from your game canvas, or a snapshot of a specific area and how to resize it or keep it in the same resolution and download it from the browser.
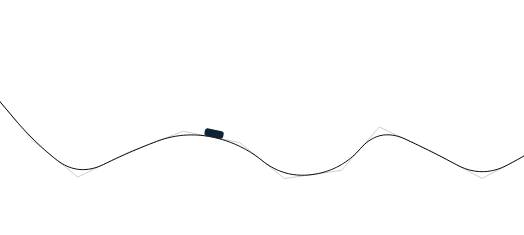
How to Create a Roller Coaster Game in HTML5
You can learn here how you can develop your own roller coaster game in HTML5, writing it from scratch in typescript or javascript. This tutorial is structured in 3 sections: Drawing Rail Segments, Generate Roller Coaster Rail Using Bezier Curves and Implementing the Roller Coaster Physics.